
Ok, let get started for the original recipe I wanted to share with you.
 |
| Our supper & Breakfast |
 |
| Look at the soft and fluffy buns! |
Basic Bread recipe
(Adapt from Carol Hu's bread baking book)
Make about 8 buns
Things needed:
- 270g of bread flour
- 30g of cake flour (You can replace it with bread/plain flour)
- 1/2 teaspoon of instant yeast (I used 3g)
- 1 egg (weigh about 50g without shell)
- 30g of sugar
- 1/8 teaspoon of salt
- 150ml of milk
- 30g of soften butter
Cookware needed: HappyCall / Non stick cooking pan

Steps:
- Place all the ingredient into a mixing bowl except butter and start kneading it into a dough using a stand mixer/bread maker/hand for 5mins. Add in the soften butter and continue to knead till the bread dough become elastic. It normally takes about 15-20mins.
- Cover the bread dough with cling wrap and go through 1st proofing for 45-60 mins or till it doubled it size.
- Pull out the bread dough from the mixing bowl and place it on your tabletop. Flatten it and divide the dough into 8 small portions. Roll each portion into a ball and let it rest for another 10mins before we wrap in our filling.
- Use a rolling pin and flatten each bun ball and place a portion of chicken filling and seal it up into like a bun, Remember we cannot put too much filling, it will only give us problem of sealing up the buns. (Yet to upload a video for better understanding, will update soon~)
- Place the buns into the cookware and go through 2nd proofing for another 45 mins or till it double it size. Happycall can only hold 4 buns Max. Proof the rest on the buns on a plate and cover it with cling wrap.
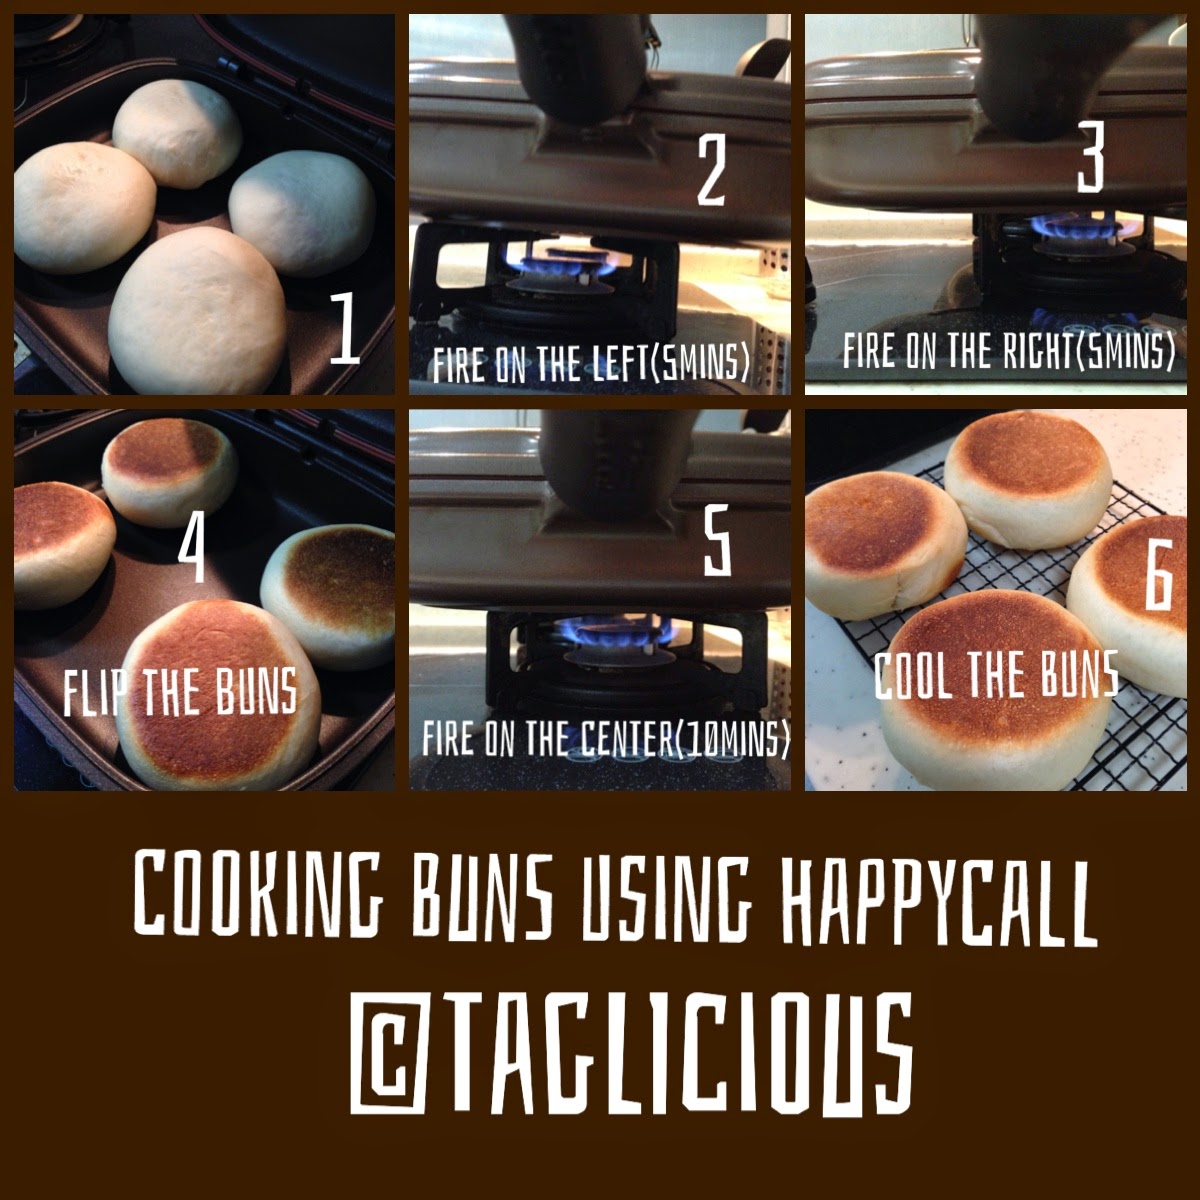
- We are ready to "bake" it in Happycall. On the lowest fire, place your Happycall on the stove toward the left side first to bake for 5mins. Then shift it to the right side to bake for another 5mins.
- Open up the lid and flipped the buns using tongs and place the buns toward the 4 corners (This is to prevent from getting burnt from direct heat). Closed the lid and continue for another 10mins of baking. This time place your Happycall in the center of the stove. (Look at the picture).
- It's done and serve warm.
Happy buns using Happycall benefit more to those of you without oven.
TAGlicious's Note:
*** Do check the buns during "baking" to prevent it from getting burnt.
*** Cooking time varies depending the size of the buns. Do try and error to tune to your cooking style.
*** Feel free to change the filling. Original recipe actually call for Mozzarella Cheese. However, i would suggest to combine some sugar and mozzarella cheese as filling. Maybe I should try this soon. :)
*** These buns can bake in preheated oven at 170C for 15-20mins.
No comments:
Post a Comment